This “how to” will guide you through the process of making an iPhone ringtone from a mp3 file using free tools on Mac OS X. I’m pretty sure most of those steps can as well be reproduced on Windows, since both applications we’re going to use — Audacity and iTunes — exist for both systems.
Step 1
Download and install Audacity and FFmpeg. Both are free open-source programs: Audacity is a sound editor, and FFmpeg is a media converter, which will allow us to export ringtones into the AAC format required by iTunes.
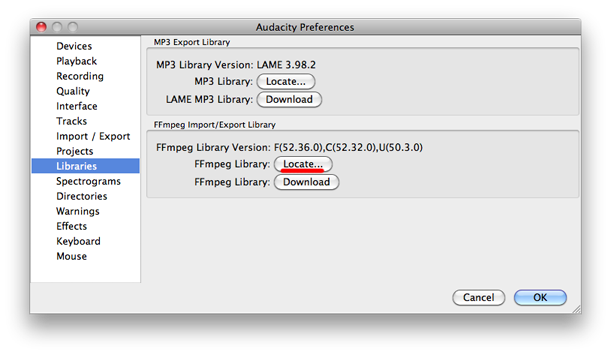
After that we need to link Audacity to ffmpeg: launch Audacity, go to preferences and click the “Locate” button under “FFmpeg Import/Export Library”.
Step 2
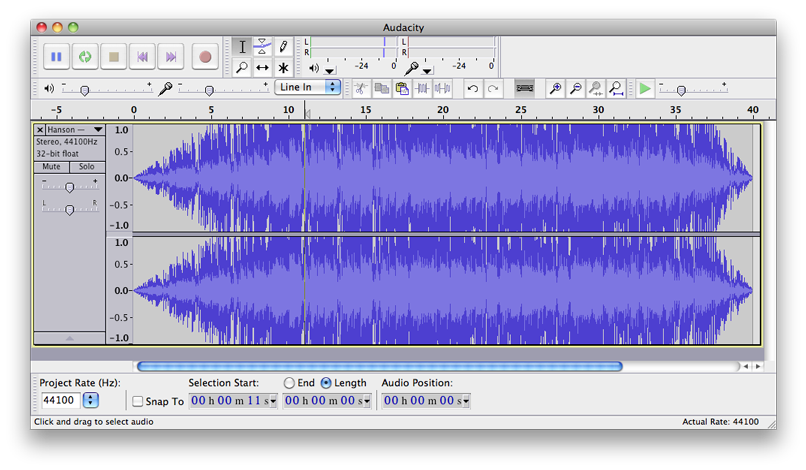
Press File → Open (in Audacity, of course) and pick the audio track you would like to make a ringtone from. I’ve chosen “Mmmbop” by Hanson which is the ringtone of Dr. House in “House” TV series. Once the file is open, you will see something like this:
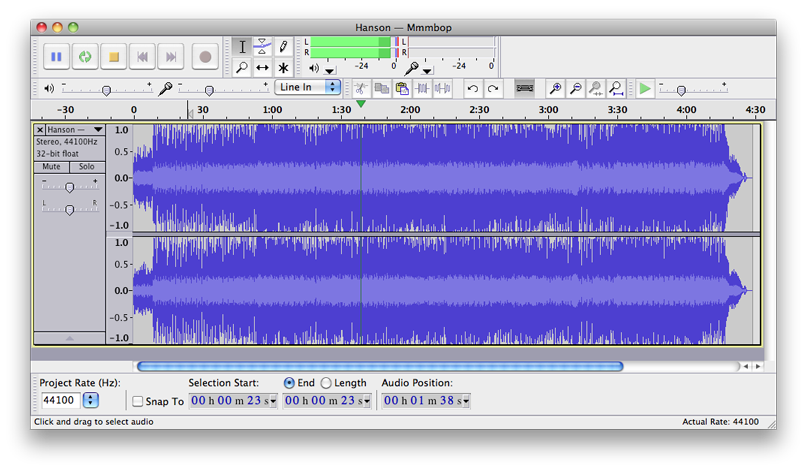 The blue graphic is an audio track. You can click anywhere on it to set the position to play from or you can select fragments of it to edit them.
Press the space bar (or the green right arrow button in the topmost controls) to play your track.
Step 3
Now we can actually start making the ringtone. iTunes has a 40 seconds length limitation for a ringtone, so you can’t just convert the whole track into it.
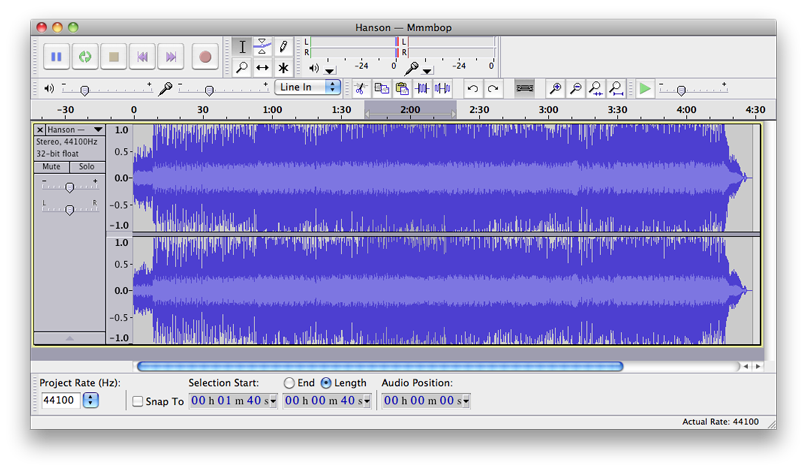
Take a look at “Audio Position” counter in the bottom of the window — when you hear the best position to cut your ringtone from, note down the time. After that, stop the playback and type the noted time into the “Selection Start” field, then switch the radio button from “End” to “Length” above the middle field and change the last number to 40. I’ve decided to cut the ringtone from 1 minute 40 seconds (mind the selection):
 Now copy the selection (Cmd+C), make a new Audacity file (Cmd+N) and paste the selected piece (Cmd+V). The new track might look totally different than it was in the original file: don’t be scared, you might need to zoom out a bit (Cmd+F to fit in window). You may now close the original file.
Step 4
Now let’s add some effects.
First of all, iPhones have quiet speakers, so it’d be worth to amplify the ringtone to the maximum. Press Cmd+A to select the whole track, then in the top menu choose Effect → Amplify.
You will see a small dialog:
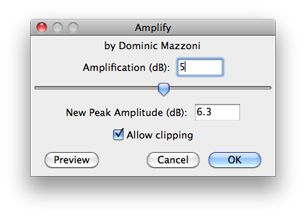
Tick “Allow clipping” and change “Amplification (dB)” to any positive value. You may experiment with preview to find the most suitable amplification value before the hisses are too strong. I’ve chosen 5.
Secondly, I wouldn’t want a call to scare me or bother people around me, so I’ve changed volume in the beginning of the ringtone to grow gradually. To do the same, just select the first 10 seconds of the track and in the top menu press Effect → Fade In.
Thirdly, the ringtone might play continuously several times before I pick up the phone, so I’ve also used the “Fade Out” effect on the last 5 seconds of the track to smooth the “discrepancy” between the end and beginning of it.
Eventually the track will resemble this:
Step 5
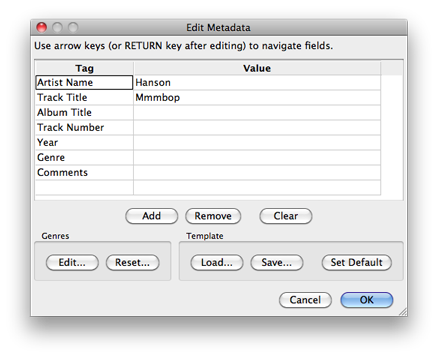
Press File → Export. The program will ask you to set some meta tags, you may optionally specify “Artist Name” and “Track Title” — that would be enough:
 In file saving dialog, choose format: “M4A (AAC) Files (FFmpeg)” and as well click the nearby “Options” button to make sure the slider remains at 128.
Step 6
After saving your file, find it in Finder and change it’s extension from “.m4a” to “.m4r”:
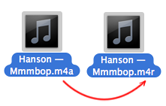 (If you don’t see extensions in file names, go to Finder preferences → “Advanced” tab → tick “Show all filename extensions”).
Double click your file to add it to iTunes. It should appear under “Ringtones” now.

See another method using itunes http://www.trickyways.com/2009/09/how-to-create-iphone-ringtones-using-itunes/