
If you use Authentik (https://goauthentik.io/) as an OAuth authentication provider for your Apache Guacamole (https://guacamole.apache.org/) instance and you’d like to customize usernames for Guacamole, here’s how you can achieve this. The steps described below may work for other applications, wired with Authentik via OAuth, too—not just Guacamole.
This guide assumes that you’ve already set up Authentik integration with Guacamole. If you haven’t done so, follow the guide from Authentik documentation.
Step 1
In Authentik, go to Directory -> Users -> click the Edit button of a user who needs access to your Guacamole instance. In the attributes field, set:
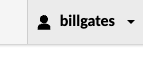
guacamole_username: billgatesAssuming billgates is a username already known to Guacamole.
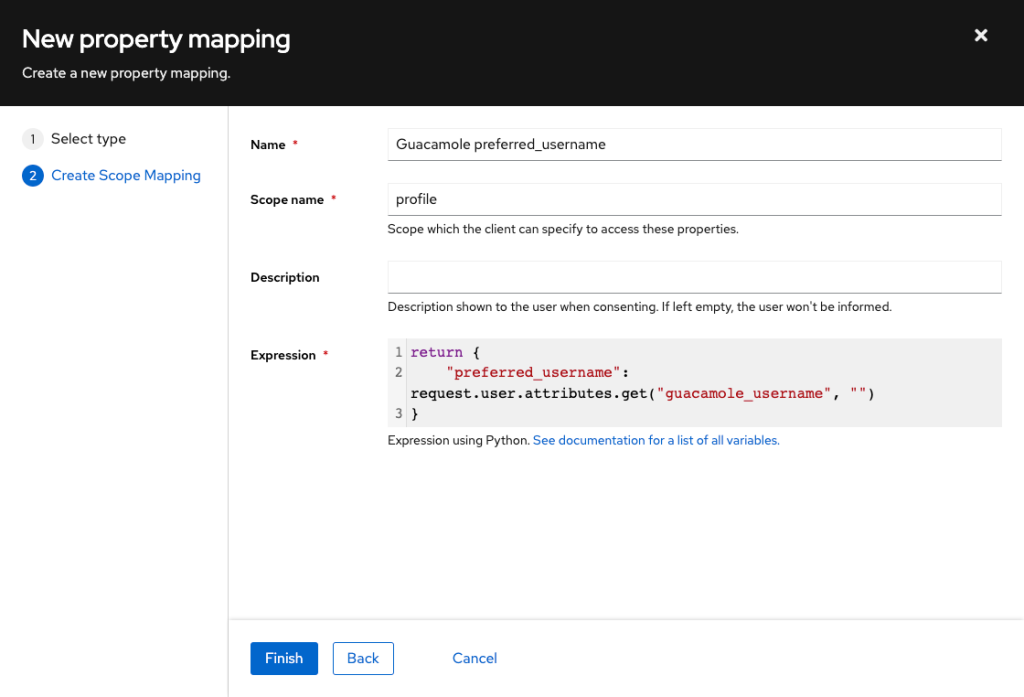
Step 2
In Authentik, go to Customisation -> Property Mappings -> Create -> Scope Mapping. Set:
- Name: Guacamole preferred_username (can be anything)
- Scope name: profile
- Expression:
return {
    "preferred_username": request.user.attributes.get("guacamole_username", "")
}
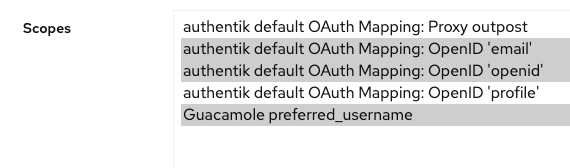
Step 3
In Authentik, go to Providers -> click the Edit button of your Guacamole OAuth provider, then expand “Advanced protocol settings” and in Scopes:
- deselect authentik default OAuth Mapping: OpenID ‘profile’
- select Guacamole preferred_username
- do not deselect other two selected scopes
The field will look like so:
Possibly you also want to tick “Include claims in id_token” if it’s not ticked already.
Step 4
To your Guacamole properties file (/etc/guacamole/guacamole.properties) add:
openid-username-claim-type: preferred_usernameRestart Tomcat (or your Guacamole Docker container):
systemctl restart tomcat9Step 5
Try logging in to Guacamole via Authentik. Confirm that you’ve logged in with the username specified in the Step 1:
* * *
If something doesn’t work, examine Authentik logs (Events -> Logs) and Guacamole logs (tail -f /var/log/tomcat9/catalina.out).
Relevant links:
Thank you for this!